Table of Contents
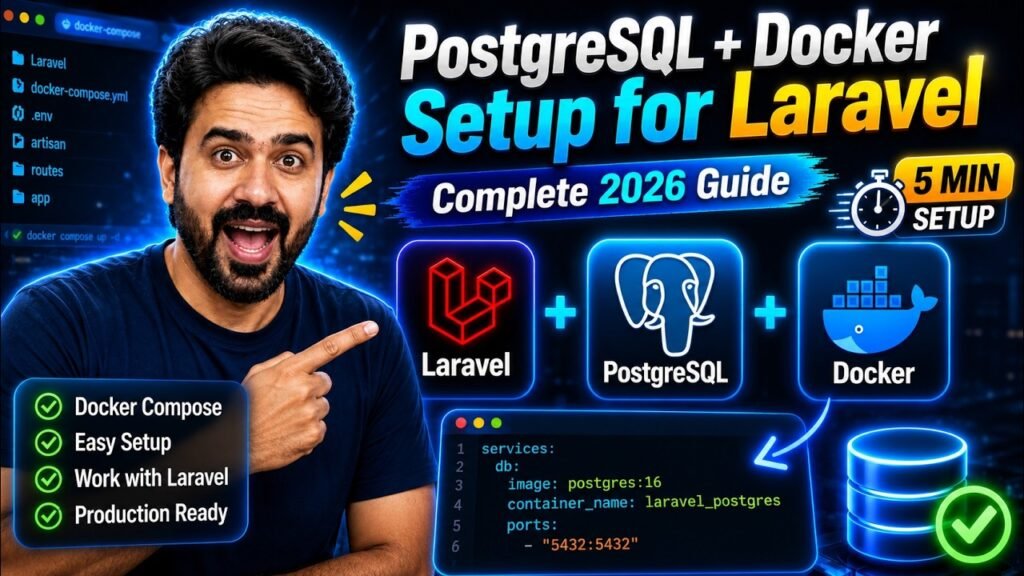
Installing PostgreSQL directly on your laptop means a service running forever in the background, a version that slowly drifts from your server’s, and a different setup on every machine your team uses. Docker fixes all three: the database lives in your project, starts with one command, and is identical for everyone.
This guide gets PostgreSQL running with Docker Compose and connected to Laravel. It also covers the PHP extension step that is missing from most guides and is the single most common reason the first migration fails.
You need: Docker Desktop installed and running, a Laravel project, and about ten minutes. No PostgreSQL installation required.
First: Why Switch From MySQL?
The honest answer is that MySQL is fine for most projects. PostgreSQL is worth choosing for specific reasons, not because it is newer.
| Where PostgreSQL helps | What it means in a Laravel project |
|---|---|
| Proper JSON support | jsonb columns can be indexed and queried quickly, so storing structured data in a column stops being a compromise. |
| Stricter by default | It refuses silently invalid data instead of quietly truncating it, which catches bugs during development rather than in production. |
| Better complex queries | Window functions, CTEs and full-text search are stronger, which matters once reports and analytics appear. |
| Array and custom types | Real array columns and your own types, where MySQL would need another table. |
| Hosting default | Many managed platforms, including Supabase, Neon, Render and Heroku, give you PostgreSQL first. |
When to stay on MySQL: an existing project that works, a shared cPanel host where MySQL is all you get, or a team that already knows it well. Migrating a live database is real work, and “Postgres is better” is not on its own a reason to spend that week.
What You Are Building
1Create the Compose File
In your Laravel project root, create compose.yaml. (The older name docker-compose.yml still works; modern Docker prefers this one.)
services:
  postgres:
    image: postgres:16
    container_name: laravel-postgres
    restart: unless-stopped
    environment:
      POSTGRES_DB: laravel
      POSTGRES_USER: laravel
      POSTGRES_PASSWORD: secret
    ports:
      - "5432:5432"        # your machine : inside the container
    volumes:
      - postgres_data:/var/lib/postgresql/data
    healthcheck:                # wait until it can really answer
      test: ["CMD-SHELL", "pg_isready -U laravel -d laravel"]
      interval: 5s
      timeout: 5s
      retries: 10

volumes:
  postgres_data:
What the healthcheck is for. A container reports “started” before PostgreSQL is ready to accept connections. Without this, the very first php artisan migrate often fails with “connection refused” and people assume the setup is broken when they simply ran it two seconds early.
Optional: add pgAdmin for a visual interface
  pgadmin:
    image: dpage/pgadmin4
    container_name: laravel-pgadmin
    environment:
      PGADMIN_DEFAULT_EMAIL: admin@example.com
      PGADMIN_DEFAULT_PASSWORD: secret
    ports:
      - "5050:80"
    depends_on:
      postgres:
        condition: service_healthy
Then open http://localhost:5050. When adding the server inside pgAdmin, the host is postgres, not localhost, because pgAdmin is itself inside Docker. If you prefer a desktop app, TablePlus and DBeaver both connect to localhost:5432 directly.
2Start It
docker compose up -d

# Check it is healthy, not just running
docker compose ps
$ docker compose ps
NAME               IMAGE         STATUS                   PORTS
laravel-postgres   postgres:16   Up 12 seconds (healthy)   0.0.0.0:5432->5432/tcp
Wait for (healthy) before moving on. The first run downloads the image, so it takes longer.
3Install the PostgreSQL Driver for PHP
This step is missing from most guides and is why most first attempts fail. Laravel talks to PostgreSQL through a PHP extension called pdo_pgsql. Without it you get a confusing error that says nothing about PostgreSQL:
$ php artisan migrate
could not find driver
(Connection: pgsql, SQL: select * from information_schema.tables ...)
Check whether you already have it:
php -m | grep pgsql
If that prints nothing, install it for your setup:
| Your setup | What to do |
|---|---|
| Ubuntu or WSL | sudo apt install php-pgsql then restart your server |
| macOS with Homebrew | Usually already included. If not, reinstall PHP: brew reinstall php |
| Windows with XAMPP or Laragon | Open php.ini and remove the semicolon from ;extension=pdo_pgsql and ;extension=pgsql, then restart |
| Laravel inside Docker | Add RUN docker-php-ext-install pdo_pgsql to your Dockerfile and rebuild |
$ php -m | grep pgsql
pdo_pgsql
pgsql
Both lines present means Laravel can now reach PostgreSQL.
4Point Laravel at the Database
Open .env and change these lines. The value of DB_HOST depends on where Laravel itself is running, which trips up almost everyone:
DB_CONNECTION=pgsql

# Laravel running on YOUR machine (php artisan serve, Herd, Valet):
DB_HOST=127.0.0.1
DB_PORT=5432

# Laravel running INSIDE Docker: use the service name instead
# DB_HOST=postgres
# DB_PORT=5432

DB_DATABASE=laravel
DB_USERNAME=laravel
DB_PASSWORD=secret
Changed .env and nothing happened? Laravel caches configuration. Run php artisan config:clear. If you have ever run config:cache, this is almost certainly your problem.
5Migrate
php artisan migrate
   INFO  Preparing database.

  Creating migration table ......................... 22ms DONE

   INFO  Running migrations.

  0001_01_01_000000_create_users_table ............. 31ms DONE
  0001_01_01_000001_create_cache_table ............. 12ms DONE
  0001_01_01_000002_create_jobs_table .............. 18ms DONE
That is the whole setup. Everything below is for verifying it, keeping your data safe, and fixing things when they break.
6Look Inside the Database
The original guide stopped at opening a shell. Here is the command it was missing, psql, plus the shortcut that skips the shell entirely:
# Straight into the PostgreSQL prompt, one command
docker compose exec postgres psql -U laravel -d laravel
psql (16.4)
Type "help" for help.

laravel=# \dt
                List of relations
 Schema |       Name        | Type  |  Owner
--------+-------------------+-------+---------
 public | cache             | table | laravel
 public | jobs              | table | laravel
 public | migrations        | table | laravel
 public | users             | table | laravel
(4 rows)

laravel=# \d users
laravel=# SELECT count(*) FROM users;
laravel=# \q
| psql command | What it does |
|---|---|
\dt | List tables |
\d users | Describe one table’s columns and indexes |
\l | List all databases |
\du | List users and their roles |
\x | Toggle expanded output, much easier to read for wide tables |
\q | Quit |
Even quicker from Laravel: php artisan db opens the same prompt using your .env settings, and php artisan db:show prints a summary of tables and sizes without leaving your project.
Pick Your Error
Click the message you are seeing and get the cause and the fix.
Backups: Do This Before You Need It
Your data lives in a Docker volume. That survives restarts and docker compose down, but not down -v, and not a laptop that dies. Two commands protect you.
# Back up to a file on your machine
docker compose exec -T postgres pg_dump -U laravel laravel > backup.sql

# Restore it
cat backup.sql | docker compose exec -T postgres psql -U laravel -d laravel

# Add backup.sql to .gitignore. It contains real data.
Learn the difference between these two commands. docker compose down stops the containers and keeps your data. docker compose down -v also deletes the volume, and your database is gone permanently. The -v is useful when you deliberately want a clean start. It is not something to type casually.
Things That Behave Differently From MySQL
Nobody warns you about these, and each one has cost somebody an afternoon.
| Situation | MySQL | PostgreSQL |
|---|---|---|
| LIKE searching | Usually case-insensitive | Case-sensitive. Use ILIKE, or whereRaw('lower(name) like ?', [...]) |
| Table and column names | Case-insensitive in practice | Folded to lowercase unless quoted. Stick to snake_case and you will never notice |
| Auto-increment ids | AUTO_INCREMENT | Sequences. After importing data you may need to reset them, or new inserts collide |
| Grouping | Lets you select ungrouped columns | Refuses. Every selected column must be grouped or aggregated |
| Booleans | Stored as 0 and 1 | A real boolean type, true and false. Comparing to 1 fails |
| JSON columns | json | jsonb: indexable and much faster to query |
| Dates | Lenient about odd formats | Strict. Invalid dates are rejected rather than stored as zeros |
// Works on MySQL, silently finds nothing on PostgreSQL
$users = User::where('name', 'like', "%{$term}%")->get();

// Works on PostgreSQL
$users = User::where('name', 'ilike', "%{$term}%")->get();

// Works on both, if you support more than one database
$users = User::whereRaw('lower(name) like ?', ['%'.strtolower($term).'%'])->get();
Your Daily Commands
| What you want | Command |
|---|---|
| Start the database | docker compose up -d |
| Stop it, keeping data | docker compose down |
| Check status | docker compose ps |
| Watch the logs | docker compose logs -f postgres |
| Open a SQL prompt | docker compose exec postgres psql -U laravel -d laravel |
| Back up | docker compose exec -T postgres pg_dump -U laravel laravel > backup.sql |
| Fresh database with seed data | php artisan migrate:fresh --seed |
| Delete everything, including data | docker compose down -v |
Common Questions
Can I run MySQL and PostgreSQL at the same time?
Yes. They use different ports, 3306 and 5432, so add both services to the same compose file. Laravel can even use both at once by defining two connections in config/database.php.
How do I move an existing MySQL database to PostgreSQL?
Not by exporting SQL and importing it; the dialects differ too much. For a development database, the simplest route is to point .env at PostgreSQL and run php artisan migrate:fresh --seed. For real data, use a tool such as pgloader, and test thoroughly, paying attention to booleans, dates and auto-increment sequences.
Which PostgreSQL version should I use?
Match whatever your production host runs. If you are starting fresh, pin a specific major version such as postgres:16 rather than postgres:latest, so a future docker compose pull does not upgrade the engine underneath your data without warning.
Is it safe to put the password in compose.yaml?
For local development, yes, it is a throwaway password on your own machine. For anything shared or deployed, move it to an environment file that is not committed, and reference it with ${DB_PASSWORD}. Never reuse a real production password locally.
Do I still need PostgreSQL installed on my computer?
No, and that is the point. The one thing you might install is the client tools, which give you psql and pg_dump on your own machine. Even that is optional, since you can run both inside the container as shown above.
My Laravel app is also in Docker. What changes?
Only DB_HOST, which becomes postgres, the service name. Add depends_on with condition: service_healthy so Laravel waits for the database, and install pdo_pgsql in your app’s Dockerfile. Our Laravel in Docker guide covers that setup.
The Full Video Tutorial
Here is the step-by-step process on video:
New Laravel, Docker and Linux tutorials every week.
Read next: How to Run Laravel Inside Docker puts the application itself in a container alongside this database.
Final Thoughts
One compose file and your whole team gets the same database, at the same version, with one command. Remember the three things that cause nearly every failure: install pdo_pgsql, use 127.0.0.1 from your machine and postgres from inside Docker, and never type down -v unless you mean it.
Set it up on one project tonight and run php artisan migrate. If you hit an error that is not in the troubleshooter above, paste it in the comments and I will help. I read every one.
If this saved you some debugging, share it with a developer still installing databases by hand.